Probably the most skilled tool engineers leverage the facility of developer gear to avoid wasting time and building up productiveness. The significance of those gear multiplies when the time to debug arrives, as debugging is also probably the most tough facet of tool building.
Input React Developer Equipment, a browser extension subsidized through Meta, the writer of React, and utilized by 3 million folks international. Weâll read about how this software can carry your React debugging talentsâfrom analyzing elements, states, and props to monitoring rendering and functionâall with out the effort of browser console logging.
Internet builders will have to decide the basis explanation for complicated issues in an app each day. One standard manner at the entrance finish is to make use of more than one console.log statements and verify the browserâs console. This method can paintings, however it isn’t specifically environment friendly. Thankfully, React Developer Equipment makes issues more uncomplicated and lets in us to:
- See the React part tree.
- Test and replace the state/props of any part within the tree.
- Observe the time for an element to render.
- Come across why an element has been re-rendered.
With those options, you will have to have the ability to optimize an app, to find insects, or pinpoint different problems with out a lot effort.
Putting in the Extension
First, observe those six steps so as to add the React Developer Equipment extension on your browser. Weâll focal point on a Chrome setup, however it’s possible you’ll observe a an identical procedure on your most popular browser (e.g., Firefox, Edge) if desired:
- Discuss with the Chrome plugin web page.
- Click on on Upload to Chrome.
- Click on on Upload extension within the pop-up that looks.
- Wait till the obtain is finished.
- Click on at the extensions (puzzle) icon within the most sensible proper nook of your browser.
- Click on at the pin icon to get right of entry to the extension simply.
Now, each time you talk over with a web page this is the usage of React, the extension icon you pinned in step 6 will trade its look:
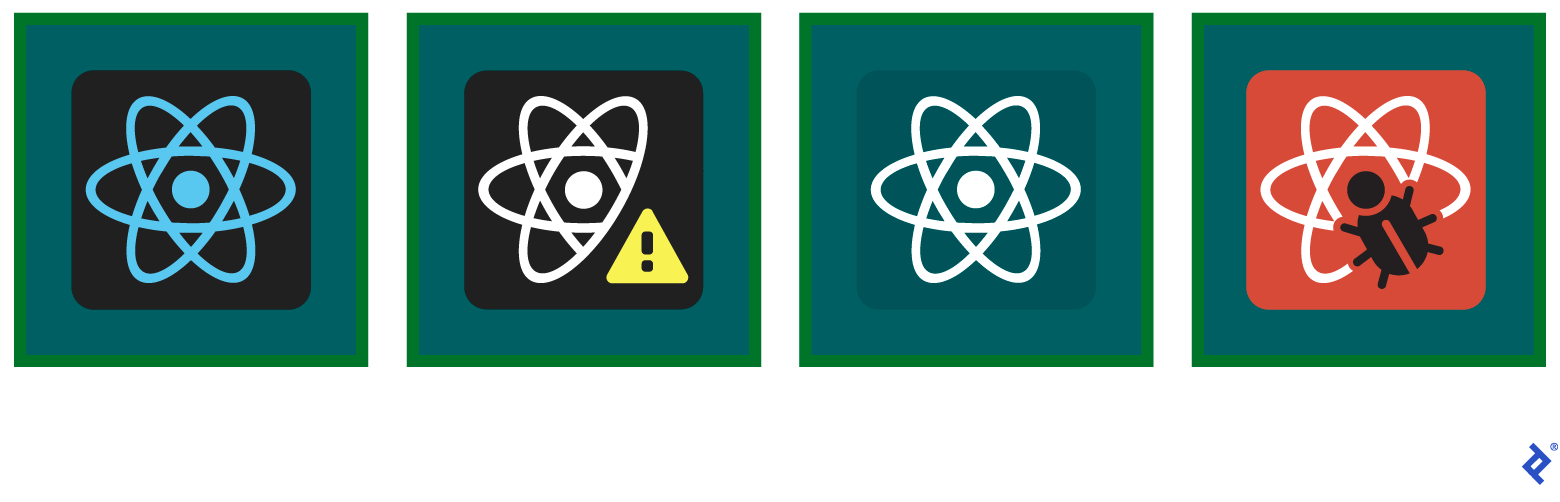
From left to proper, the icon states proven are used when a web page:
With our extension up and operating, subsequent weâll create an utility to debug.
Making a Check Software
The create-react-app application software can easily bootstrap an app in seconds. As a prerequisite, set up Node.js for your gadget, then create your app by way of the command line:
npx create-react-app app-to-debug
The operation may take a little time, because it must initialize the codebase and set up dependencies. As quickly because itâs performed, move to the applianceâs root folder and get started your new React app:
cd app-to-debug
npm get started
When compiled, your app seems for your browser:

Our React Developer Equipment extension icon now signifies that we’re operating within the building surroundings.
Letâs transfer alongside and be told extra about the real developer gear. First, open the developer console (Possibility + â + J on Mac or Shift + CTRL + J on Home windows/Linux). There are more than one tabs to be had (Parts, Console, and so on.). The only we’d like at this degree is Elements:
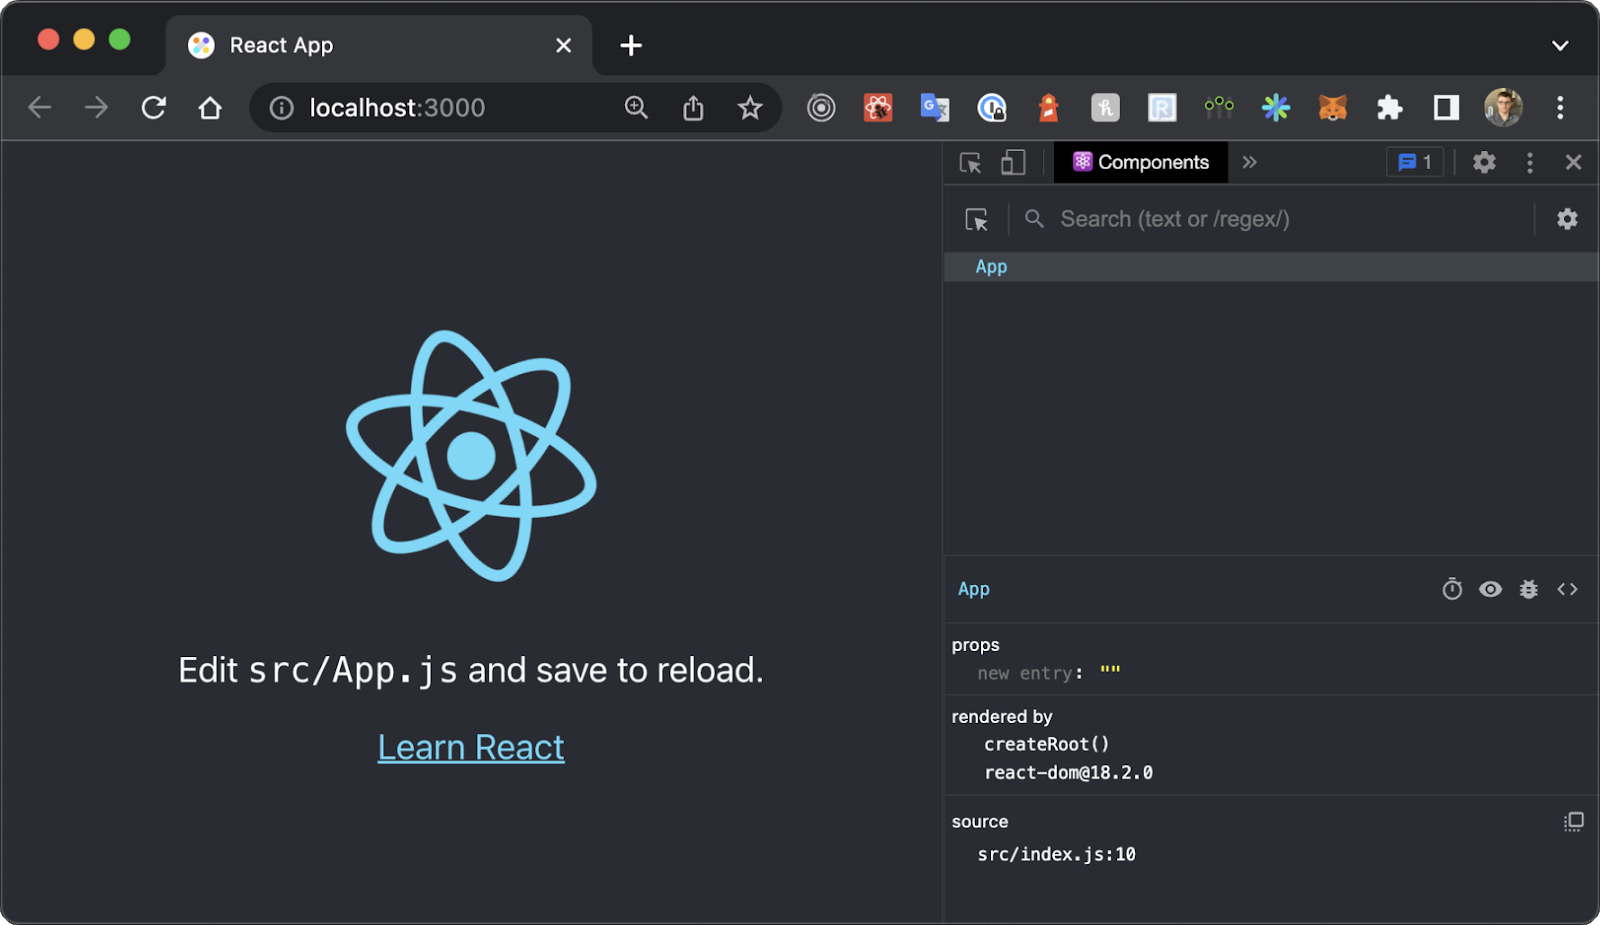
There’s only a unmarried part to be had at this level. Thatâs right kind as a result of our take a look at utility has just one part rendered App (see src/index.js). Click on at the part to turn its props, the model of react-dom used, and the supply document.
Monitoring Part State
Letâs get started with the characteristic youâll be the usage of more often than not: checking/enhancing the state of an element. To exhibit this capability, we will be able to make some adjustments to the take a look at mission. We will be able to change the React placeholder homepage with a easy login shape retaining 3 state items: a username string, a password string, and a boolean representing a âTake into account meâ environment.
Within the src folder, take away App.css, App.take a look at.js, and brand.svg, then upload a brand new LoginForm.js document as follows:
import { useState } from "react";

const LoginForm = () => {
  const [username, setUsername] = useState("");
  const [password, setPassword] = useState("");
  const [rememberMe, setRememberMe] = useState(false);

  go back (
    <shape
      taste={{
        show: "flex",
        flexDirection: "column",
        hole: "8px 0",
        padding: 16,
      }}
    >
      <enter
        title="username"
        placeholder="Username"
        sort="textual content"
        price={username}
        onChange={(e) => setUsername(e.currentTarget.price)}
      />
      <enter
        title="password"
        placeholder="Password"
        sort="password"
        price={password}
        onChange={(e) => setPassword(e.currentTarget.price)}
      />

      <div>
        <enter
          identification="rememberMe"
          title="remember_me"
          sort="checkbox"
          checked={rememberMe}
          onChange={() => setRememberMe(!rememberMe)}
        />
        <label htmlFor="rememberMe">Take into account me</label>
      </div>

      <enter sort="post" title="login" price="Log in" />
    </shape>
  );
};

export default LoginForm;
Take note of the part declaration method. Weâre the usage of the named part (const LoginForm => â¦) to peer its title within the dev gear. Nameless elements are displayed as Unknown.
LoginForm part can be our debugging goal, so letâs render it inside of App.js:
import LoginForm from "./LoginForm";

const App = () => {
  go back <LoginForm />;
};

export default App;
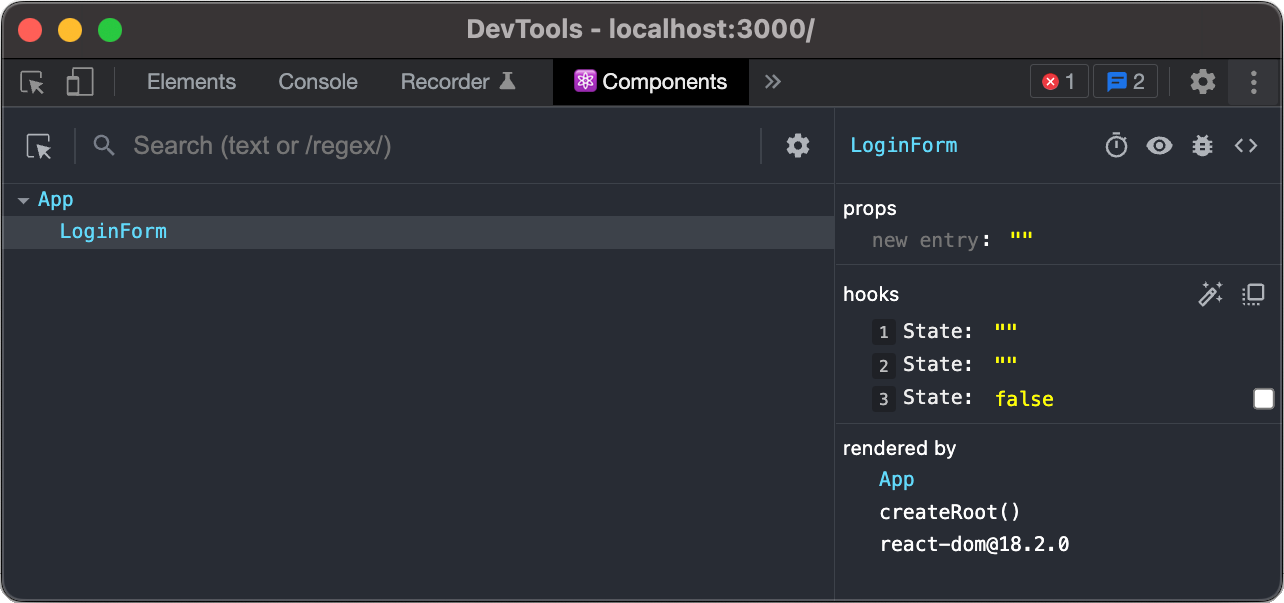
Go back to the browser window with the Elements tab open. Now, subsequent to the App part youâll see the LoginForm part. Clicking on LoginForm will disclose all of the state pieces weâve created the usage of useState hooks. Since we havenât but entered any textual content or verify field inputs, we see two empty strings and false:
Sort the rest within the username and password fields or click on at the verify field to peer the values within the debugging window replace:
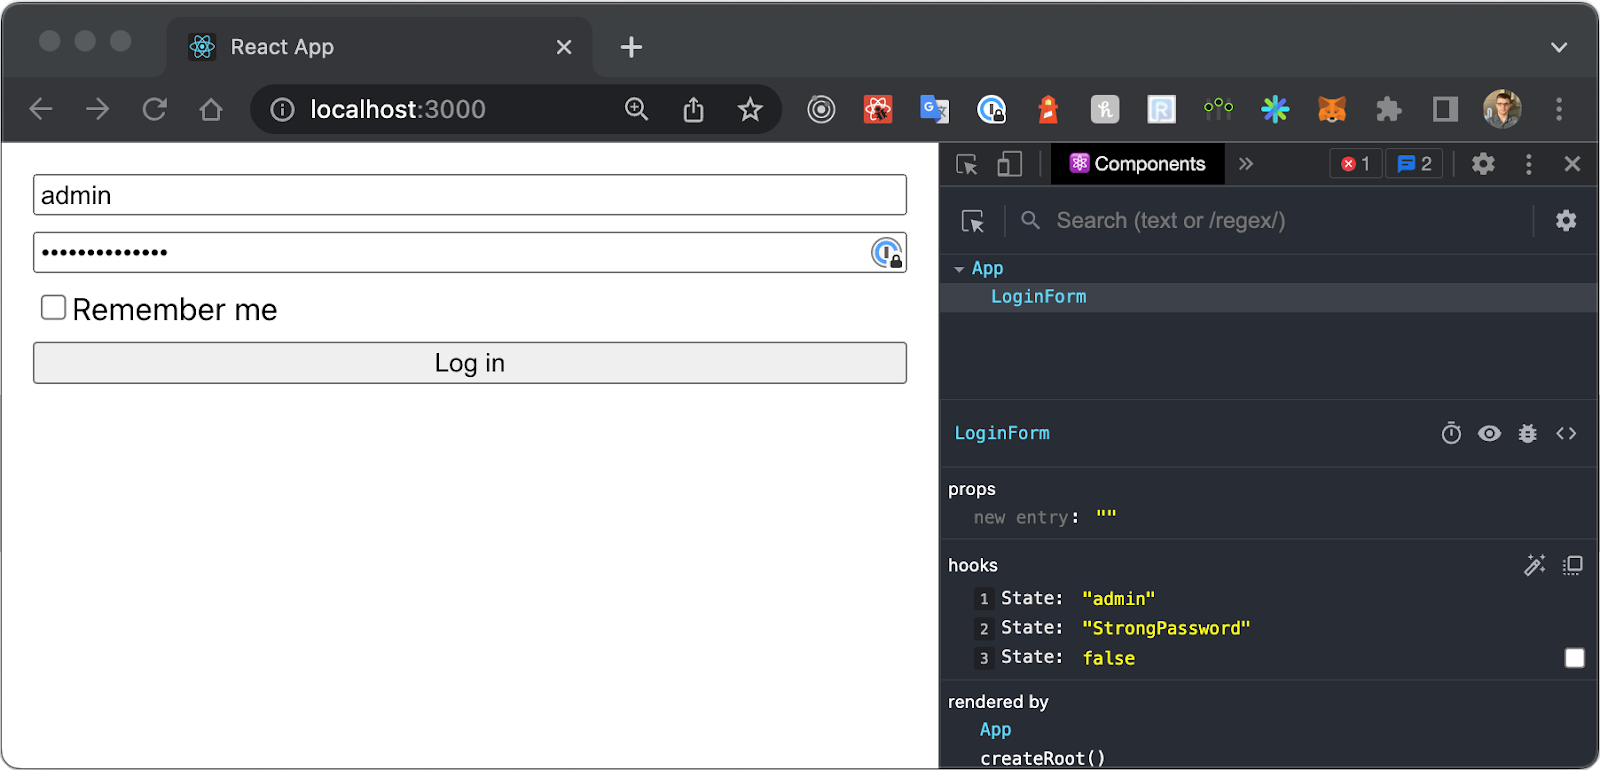
You’ll have spotted that there are not any names for the state variables. They all are referred to as State. That is the predicted conduct of the software as a result of useState accepts handiest the worth argument ("" or false in our instance). React is aware of not anything in regards to the title of this state merchandise.
A application referred to as useDebugValue in part solves this downside. It might probably set the show title for customized hooks. For example, you’ll be able to set the show title Password for a customized usePassword hook.
Tracking Part Props
We will observe now not handiest state adjustments, but in addition part props. Weâll first regulate LoginForm:
const LoginForm = ({ defaultUsername, onSubmit }) => {
  const [username, setUsername] = useState(defaultUsername);
  const [password, setPassword] = useState("");
  const [rememberMe, setRememberMe] = useState(false);

  go back (
    <shape
      taste={{
        show: "flex",
        flexDirection: "column",
        hole: "8px 0",
        padding: 16,
      }}
      onSubmit={onSubmit}
    >
// ...
The code above will upload a defaultUsername belongings to have a username crammed at the preliminary load, and onSubmit belongings to keep watch over post shape movements. We additionally will have to set those housesâ defaults inside of App:
const App = () => {
  go back <LoginForm defaultUsername="[email protected]" onSubmit={() => {}} />;
};
Reload the web page after the adjustments had been made and also youâll see the props within the Elements tab:

If you want to test how the part will react to another state/props, you’ll be able to do it with out converting any code. Click on at the state/prop price within the Elements tab and set the specified price.
Measuring Software Efficiency
At this level, we will have to be aware that monitoring props and state is imaginable by way of console.log. Alternatively, React Developer Equipment provides two benefits over this method:
- First, logging to the console is unrealistic when scaling a mission. The extra logs you will have the harder it’s to search out what you want.
- 2d, tracking elementsâ states and houses is handiest a part of the activity. For those who run right into a case when your utility works accurately however is sluggish, React Developer Equipment can establish positive efficiency problems.
For a normal evaluation of an utilityâs efficiency, React Developer Equipment can spotlight DOM updates. Click on at the equipment icon within the most sensible proper nook of the Elements tab.
Youâll see a pop-up with 4 tabs. Click on at the Common tab and make a choice the Spotlight updates when elements render verify field. Get started typing within the password box, and also youâll have your shape wrapped with a inexperienced/yellow body. The extra updates carried out in step with 2d, the extra highlighted the body turns into.

For a extra detailed efficiency breakdown, weâll transfer from the Elements tab to the Profiler tab (donât put out of your mind to uncheck the spotlight possibility).
Within the Profiler tab, you’ll see a blue circle within the most sensible left nook. Itâs a button to begin profiling your utility. Once you click on on it, all state/props updates can be tracked. Sooner than appearing this step, then again, we will be able to click on at the equipment icon within the most sensible proper nook of the tab and verify the Report why every part rendered whilst profiling verify field. It is going to prolong the capability of the profiler with the updatesâ explanations.

The configuration is now entire, so letâs continue and profile our app. Shut the settings overlay and click on at the blue circle button. Get started typing within the password box and make a choice the âTake into account meâ field. Then click on the circle button once more to prevent profiling and spot the effects.

Within the profiling effects, you will have to see itemized updates of the LoginForm part. Our instance displays 9 updates: 8 for every persona within the password box and one for the âTake into account meâ verify field. For those who click on on any replace, you’ll have a proof of why the render took place. As an example, the primary render says âHook 2 modified.â
Letâs have a look at the second one hook of the LoginForm part:
const [password, setPassword] = useState("");
Our consequence is sensible since the second one hook is accountable for password state control. For those who click on at the ultimate render, it’s going to display âHook 3 modifiedâ as a result of our 3rd hook handles the âTake into account meâ state.
Viewing React useReducer and Context
The examples above supply a glimpse of straightforward eventualities. Alternatively, Reactâs API comprises extra sophisticated options, equivalent to Context and useReducer.
Letâs upload them to our utility. First, we will be able to have so as to add a document with the context. The context weâre going to make can be used for logging a consumer in and offering the guidelines of the login motion. Weâll create the AuthenticationContext.js document with the next content material:
import { useCallback, useContext, useReducer } from "react";
import { createContext } from "react";

const initialState = {
  loading: false,
  token: undefined,
  error: undefined,
};

const AuthenticationContext = createContext({
  ...initialState,
  logIn: () => {},
});

const reducer = (state, motion) => {
  transfer (motion.sort) {
    case "LOG_IN":
      go back { ...state, loading: true };
    case "LOG_IN_SUCCESS":
      go back { ...state, loading: false, token: motion.token };
    case "LOG_IN_ERROR":
      go back { ...state, loading: false, error: motion.error };
    default:
      go back motion;
  }
};

const mockAPICall = async (payload) => ({ token: "TOKEN" });

export const AuthenticationContextProvider = ({ kids }) => {
  const [state, dispatch] = useReducer(reducer, initialState);

  const logIn = useCallback(async (payload) => {
    take a look at {
      dispatch({ sort: "LOG_IN" });
      const reaction = wait for mockAPICall(payload);
      dispatch({ sort: "LOG_IN_SUCCESS", token: reaction.token });
    } catch (error) {
      dispatch({ sort: "LOG_IN_ERROR", error });
    }
  }, []);

  go back (
    <AuthenticationContext.Supplier price={{ ...state, logIn }}>
      {kids}
    </AuthenticationContext.Supplier>
  );
};

export const useAuthentication = () => useContext(AuthenticationContext);
This context will give you the loading standing, error, consequence (token), and motion to accomplish (logIn) of our authentication common sense. As you’ll be able to see from the reducer serve as, starting up the login motion will set the loading price to true. The token can be up to date if the reaction is a hit; in a different way, an error can be set. We receivedât upload a luck standing price as a result of this price is to be had thru token (if there’s a token, weâve had a a hit operation).
To populate our app with those values, weâll want to replace our App.js document:
import { AuthenticationContextProvider } from "./AuthenticationContext";
import LoginForm from "./LoginForm";

const App = () => {
  go back (
    <AuthenticationContextProvider>
      <LoginForm defaultUsername="[email protected]" />
    </AuthenticationContextProvider>
  );
};

export default App;
You’ll be able to now reload the web page, open the Elements tab and spot the context within the part tree:
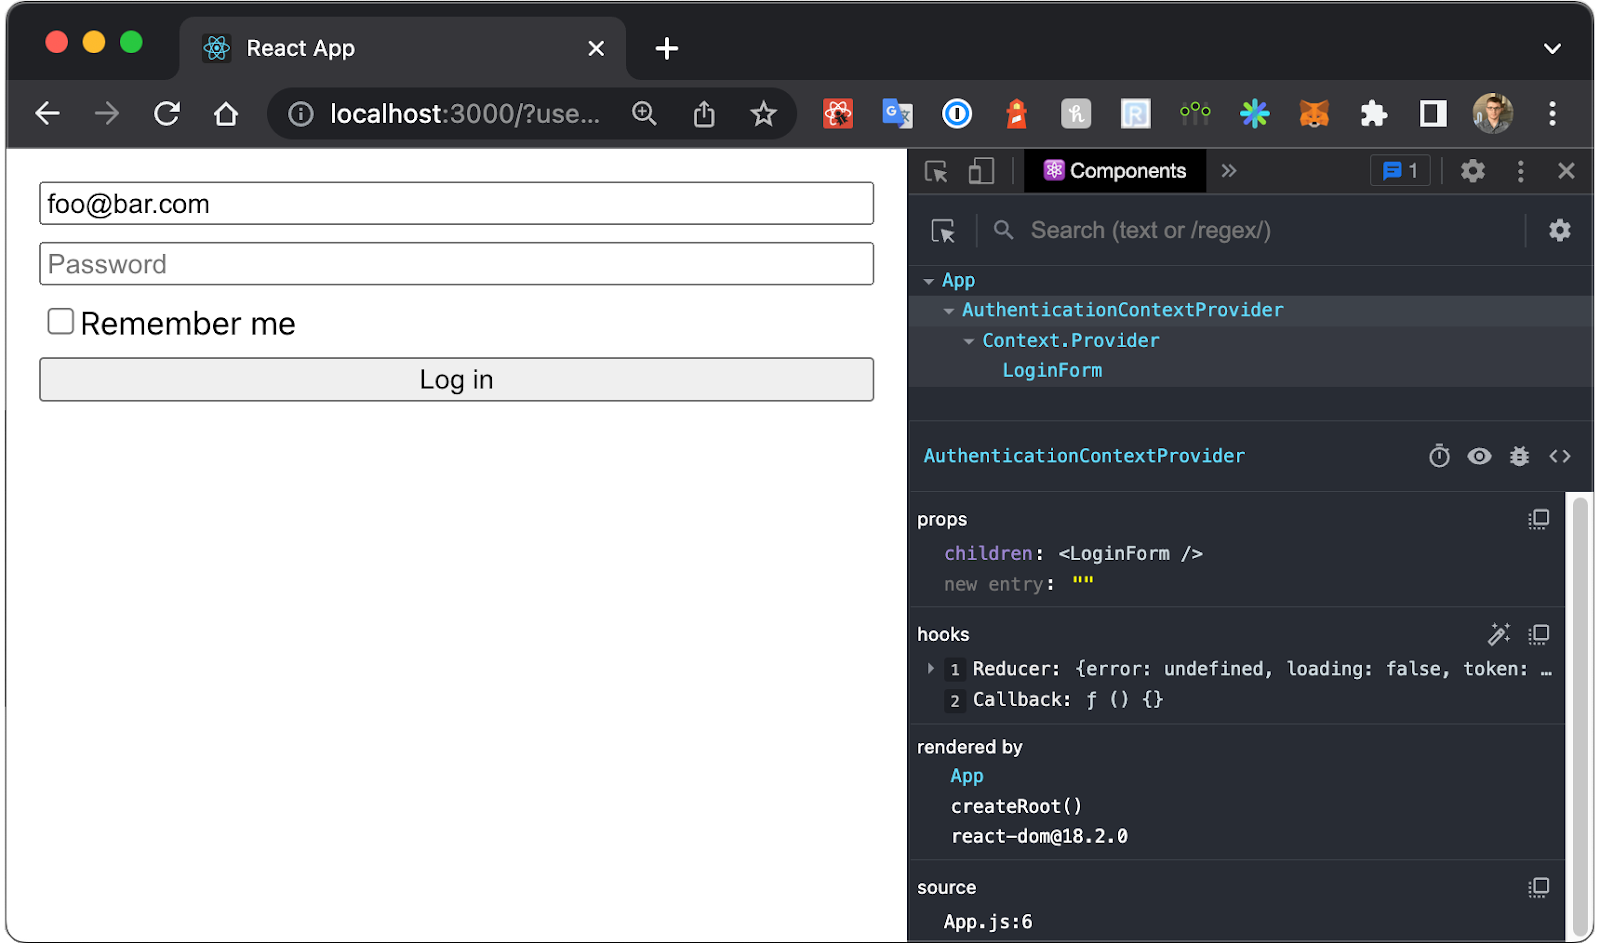
There are two nodes added: AuthenticationContextProvider and Context.Supplier. The primary one is the customized supplier weâre the usage of to wrap the appliance in App.js document. It comprises a reducer hook with the present state. The second is the context illustration appearing the precise price equipped all over the part tree:
{
price: {
error: undefined,
loading: false,
token: undefined,
logIn: Æ () {}
}
}
To make sure that React Developer Equipment can observe reducer adjustments and display the real state of the context, weâll regulate the LoginForm.js document to make use of the logIn motion because the onSubmit callback:
import { useCallback, useState } from "react";
import { useAuthentication } from "./AuthenticationContext";

const LoginForm = ({ defaultUsername }) => {
  const { logIn } = useAuthentication();

  const [username, setUsername] = useState(defaultUsername);
  const [password, setPassword] = useState("");
  const [rememberMe, setRememberMe] = useState(false);

  const onSubmit = useCallback(
    async (e) => {
      e.preventDefault();
      wait for logIn({ username, password, rememberMe });
    },
    [username, password, rememberMe, logIn]
  );

  go back (
// ...
Now, should you return to the browser and click on Log in, youâll see that token, which was undefined, has an up to date price in Context.Supplierâs props.
Debugging a React utility does now not prevent at React Developer Equipment. Engineers can leverage more than one utilities and their mixture of options to create the easiest procedure for his or her wishes.
Why Did You Render
The primary software value bringing up is a first class efficiency analyst, why-did-you-render. Itâs now not as easy to make use of as React Developer Equipment, however it complements render tracking through explaining every render with human-readable textual content, with state/props variations and concepts on how you can repair problems.

Redux DevTools
Redux is a well known state control library utilized by many React engineers, and you’ll be able to be told extra about it through studying my earlier article. Briefly, it is composed of 2 portions: movements and states. Redux DevTools is a consumer interface representing movements brought on for your app and the ensuing state. You’ll be able to see the add-on in motion on a Medium webpage:

Simplified Downside-solving for Your Subsequent App
React Developer Equipment is a straightforward but robust addition on your workflow that makes issues more uncomplicated to mend. Relying for your necessities, it’s possible you’ll take pleasure in further gear, however React Developer Equipment will have to be your place to begin.
Along with your new React Developer Equipment skillset, you’ll grasp debugging your subsequent app and will discover any React-based web page or app a number of instances quicker in comparison to a standard code-check.
The editorial crew of the Toptal Engineering Weblog extends its gratitude to Imam Harir for reviewing the code samples and different technical content material introduced on this article.